Showing posts with label RECIPE. Show all posts

Mar 17, 2013

Pre-SPRING TREAT: Orange White Chocolate Flat Cakes.

This recipe is perfect for this time of the year, with Easter and Spring approaching. It has white chocolate and orange which are popular ingredients for Easter treats like figolli, colomba and chocolate eggs. It's easy to make, doesn't take long and it yields a relatively large number of flat cakes. In reality, I wanted to make cookies and I followed my last cookies recipe. But because I added the orange juice, I should have added more flour but I didn't. So instead of cookies I got flat cakes. My husband loved them, and so did I. 


If you want to make cookies rather than flat cakes simply add an extra 1/2 to 1 cup flour depending on how soft you want you cookies to be. If you'd like to make flat cakes follow this recipe. Replace the milk chocolate flakes or chips with 100g white chocolate flakes or chips. And add the juice of 2 oranges. Follow the rest of the ingredients and cooking steps. The only difference is that the batter will be more runny and once you put the baking sheets in the oven, the batter will spread and you will get giant soft cookies. Let them cook on one side well by moving the sheets on different levels of your oven. When they are browned on one side, take the baking sheet out, cut the giant cookie into small pieces and turn them on the other side. Put them back in the over for few more minutes until they start crisping on the other side. Sprinkle with icing sugar and serve.


STAY FAB

Feb 12, 2013

VALENTINE'S LEMON CAKE

Since last Summer I have been loving anything with a lemon flavour. I started putting lemon on my healthy noodles, in my honey drink, in my hummus and of course in my baking. So here is my latest cake recipe featuring lemon juice. I like to use bottled lemon juice because of how convenient and inexpensive it is.


Ingredients
130g all purpose flour
80g cake flour
1/2 cup sugar
3/4 teaspoon baking powder
pinch of salt
113g soy butter
3 small eggs
2 teaspoons vanilla essence
15 teaspoons lemon juice (I would have used some lemon essence as well but I didn't have it)
1 cup milk


Preparation
And now it's a simple matter of mixing the dry ingredients together, doing the same for the wet ones; and the combining the two until you get a smooth but not too runny consistency. You can use an electric beater if you like. Bake for about 20 minutes in your preheated oven, preferably in the middle. And don't forget to grease the tin. I used soy butter.


STAY FAB


You might also want to check the following:
   Healthy Banana                     Perugina & Chinese 
           Bread                                  Cherries Cookies
        

   Valentine's Cupcakes      Valentine's sweet pastry hearts
           

Feb 8, 2013

Valentine's Perugina Chocolate & Chinese Cherries Cookies.

Believe it or not, in less than a week it will already be Valentine's day. It seems like Christmas and New Year was last week, yet so much time has already passed. And we are ready to celebrate this romantic day with our loved one. If you are looking for a sweet treat to share with your partner on Valentine's day or during the pre-Valentine weekend here is a recipe I tried few weeks ago which is perfect for this time of the year. It features chocolate and cherries on top of some heart shaped cookies. Perfect!


Ingredients


Preparation
This recipe is super easy if you have some leftover cookie pastry. I used the pastry left from my Christmas mince pies, which I had stored in my freezer. And these cookies turned lovely.
  1. Make the pastry following my recipe
  2. Cut your heart shaped cookies.
  3. Bake them for few minutes (about 10 or less)
  4. Top each cookie with small pieces of chocolate and few cherries.
  5. Bake for 2 minutes or so until the chocolate melts.
  6. Let them cool and they are ready to eat.
If you are looking for a healthier Valentine's treat, which is especially great for a healthy Valentine's day breakfast, check this banana bread recipe.

STAY FAB

Feb 5, 2013

Low calories banana cake....healthy & yummy!

Yesterday I made this delicious banana bread/cake. And because it turned so scrumptious, even if it has no artificial sugar and only healthy ingredients, I want to share my recipe with you. So here it is....


Ingredients
250ml wholemeal flour
pinch salt
1 teaspoon baking powder
1/2 teaspoon baking soda
cinnamon (as much as you like)

3 bananas (you can use ripe, regular or slightly soft bananas)
1 large egg
1 tablespoon vanilla essence
3 teapoons Sweet Freedom Natural Sweeteness Syrup (100% from fruit)
200ml soy milk
1 tablespoon olive oil

sprinkle on top:
cinnamon
2 tablespoons desiccated coconut

Preparation
1. Combine the dry ingredients in one bowl.
2. Mash the bananas in a separate bowl; and add to the dry ingredients.
3. Add the rest of the wet ingredients and mix well until you achieve a smooth consistency.
4. Preheat your oven.
5. Grease your cake tin with soy butter; and pour the batter.
6. Bake for about 1 hour or slightly more.
7. Half way through your baking, add the extra cinnamon and coconut which you mixed together on top of the cake and continue baking.
8. When ready, let the bread/cake cool for about 1 hour and then transfer to serving plate.

The above recipe yields a 23 cm by 11.5 cm bread/cake. If you divide the cake into 8 slices, each slice will have about 196 calories.

If you are looking for healthy but tasty recipes, to either lose weight or maintain a healthy lifestyle, check my 30 DAYS HEALTHY MEAL PLAN.

STAY FAB

Jan 31, 2013

Low calorie Rusks Pudding

Yesterday I launched my 30 Days Healthy Meal Plan series which will feature one post every day on my food blog, AlessiAs CUEs. That same day I felt I needed a sweet fix, which was healthy and low in calories. So I came up with this healthy rusks pudding. Here is my recipe!


Ingredients
20 wholemeal rusks
about 15 dry prunes cut into 2 halves
1 cup heated soy milk
1 egg
2 teaspoons vanilla essence
1 teaspoon baking powder
some honey syrup
a bit of water
2 tablespoons carob powder

Preparation
I started by crushing the rusks in a big bowl. Then I added all the other ingredients and mixed well until I achieved a medium soft but sticky consistency. I placed the mixture on a tin covered with baking paper which I greased with soy butter. I baked the pudding for about 15 minutes in my pre-heated oven.

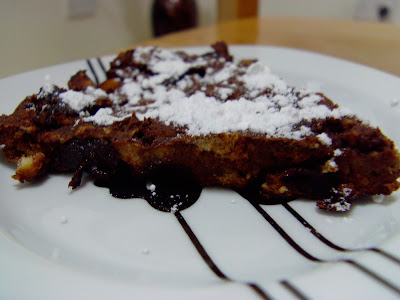
You can sprinkle icing sugar on top, or spread some jam. If you divide this pudding into 8 slices, each slice should have between 150 to 200 calories.

STAY FAB

Jan 30, 2013

30 Days Healthy Meal Plan

This month I finally did it! I have been telling myself, I need to get back to planning my meals for the entire month so that I can write a full groceries list for that month and purchase most of it in one go. By having everything I need to cook healthy delicious meals, I have no excuse to continue eating brown sandwiches almost every day. And purchasing most of your groceries all at once, will save you time, diesel and will make it less likely for you to get tempted in buying things you don't need each time you visit your local supermarket. Planning your meals ahead, and shopping at the beginning of the month, also makes it easier to set a budget and stick to it.

Every day, starting today, for the next 30 days I will be sharing my main meal with you. The meals are going to be diverse, healthy, balanced and most important tasty. There will be vegetables meals, pasta meals, panini meals, warm salads (since it's still pretty cold), pies, wraps as well as meals featuring chicken, salmon and mince pork.

In each daily post I will be showing my meal with pictures and sharing my recipe with you. Since I have a food blog, I figured it makes more sense to have this 30 days meal plan series of posts up on it rather than here. You can click here to visit my food blog, AlessiAs CUEs or click on the links below which will direct you to each individual meal post.

Day 1.....Lemon Pepper Soba Buckwheat Noodles with Green Beans

Day 2.....Lentils, Tomatoes and Eggs with soy buttered wholemeal toast

Day 3.....Chicken Veggie Wrap with Hummus

Day 4.....Ciabatta with Wurstel, lettuce, and cheese 

Day 5.....Smoked Salmon Pasta with Soy Cream & Peas

Day 6.....109 Calories Salad for Sandwiches

Day 7.....Lemon Buckwheat Noodles with Green Beans, 1 egg & hummus

Day 8.....Cauliflower Chowder with soy milk, cheese, grana padano and sundried tomatoes

Day 9.....Wholemeal Ciabatta for a Quick Lunch

Day 10....Spinach & Artichoke Creamy Casserole with a wheat wrap

Day 11.....Potato Mayo Veggie Salad

Day 12.....Chicken Veggie Crusted Pie

Day 13.....Spinach Frittata with cheese & tomatoes

Day 14.....Broccoli, Green Olives & Tomatoes

Day 15.....Cauliflower Cake for Lunch

Day 16.....Potato & Turkey Ham Pie with Buttered Rosemary Dill Carrots

Day 17.....Wheat Wrap Under 600 calories

Day 18.....Pink Salad with Crunchy Crostini

Day 19.....600 Calories Crunchy Bruschetta

Day 20.....600 Calories Pasta Salad

Day 21.....French Toasted Ham & Cheese Crostini

Day 22.....Smoked Salmon Cannelloni

Day 23.....Scrambled Veggie Frittata on a flour tortilla base

Day 24.....Salad Pasta Rolls (650 calories)

Day 25.....500 Calories Thai Fish Broth

Day 26.....Creamy Gnocchi with Zucchini & Tomatoes (600 calories)

Day 27.....Spinach & Sundried Tomatoes Cheesy Baked Roll (800 calories)

Day 28.....Spinach, Chickpeas, Egg Mayo Salad (625 calories)

Day 29.....Baked Gnocchi with Spinach, Carrots and Tomato Sauce (650 calories)

Day 30.....600 Calories Fish Wrap with Eggplant & Chickpeas

I really hope these posts can be helpful in planning and making your meals. But most importantly I hope that this series inspires you to eat healthier every day, if you are not already doing so. The key to eating healthy for life, and not for a week or a month, is to understand that you can eat healthy and still enjoy what you eat on a daily basis. And of course, nobody said you cannot eat less healthy foods every now and then.

I will really love to get your feedback. So feel free to comment here on on my food blog.

STAY FAB

Dec 30, 2012

Christmas Log with Carob Powder....

This year I decided to bake only twice during the Christmas holidays, so as to cut the calories intake, especially since we also got loads of packaged cakes, biscuits and chocolates. I made mince pies which are my favourite Christmas treat just before Christmas. You can read my mince pies recipe here. And yesterday I made Christmas logs just in time for New Year's Eve. So here is my recipe. And if you are still feeling like baking something else you can read my Christmas fruit cake recipe here


INGREDIENTS (yield 1 large log, 1 medium and 1 small)
360g Devon morning coffee biscuits
2 tablespoons carob powder
200g cherries
100g pistachios
80g lemon peel
2 tablespoons rum essence
1 medium cup soy milk
100g soy butter

3 tablespoons carob powder
2 tablespoons corn flour
vanilla essence
vanilla icing sugar


PREPARATION
I started by crushing the biscuits. I added the carob powder and mixed well. Then added all the dry fruit, the milk, the rum and finally the butter cut into small pieces. I combined everything with a fork until the butter was well spread into the mixture. And then I placed some of the crumble on oven paper and started molding it with my hands in the shape of rolls. I then folded the paper and placed it into the freezer. I repeated this process for the other 2 logs. I left the logs for almost one day in the freezer. Then I took them out and let them thaw. Then I covered the logs with the carob sauce I made using just carob powder, corn flour, vanilla essence and some vanilla icing sugar. I sprinkled some icing sugar on top and kept the logs in the fridge.


STAY FAB
&
HAPPY NEW YEAR

Dec 22, 2012

Homemade Mince pies 2012

Last year was my first time making mince pies from scratch. I made the mincemeat, the pastry, assembled the mince pies and also packed them nicely to gift them to my family. Because I liked the result and also enjoyed making them so much, I decided to make them again this year. I followed my old recipe but I made various changes to it and I can say that I definitely like this year's mince pies a lot. One thing I wasn't happy about last year's mince pies was the not so soft pastry. And this year I got a nicely soft pastry. The mincemeat this year is also sweeter than last year although I used no sugar in it. And while last year's mince pies post is called Light Mince pies, I can definitely say this year's mince pies are definitely lower in calories because of the lower sugar content used. Read my LIGHT MINCE PIES 2011 here. If you want to know my new recipe keep reading....


INGREDIENTS & PREPARATION (for soft not too sweet mince pies)

MINCEMEAT (I make it one day in advance)
500g sultanas
100g red raisins
100g Chinese red cherries
150g lemon peel diced
6 large apples peeled, cored and cut into small pieces
3 oranges juiced
1/3 cup lemon juice
2 teaspoons ground cinnamon
1/2 teaspoon ground nutmeg
4 teaspoons rum essence

I simply mix all the dry fruit and apples in a big plastic bowl. I then juice the oranges and add the rest of the liquid ingredients and spices. I mix this juice well and then pour it on top of the fruit mix. I mix well for a few minutes and then seal the bowl with plastic wrap. I leave the sealed bowl on top of my counter until the next day when I make the pastry and bake the mince pies.


PASTRY  (I used 4 times the ingredients below to make 4 batches of pastry)
175g all purpose flour
75g cake flour
1/6 cup of granulated sugar
1/4 cup icing sugar
1 teaspoon vanilla essence
1 pinch salt
1/4 teaspoon baking powder
3 tablespoons iced water
100g soy butter cut into pieces

I combine the ingredients in the order they are listed above in a medium bowl and then rub the butter into the dry ingredients until a sorts of crumbly mixture forms. Then I start making balls out of the pastry using my hands and I keep working the pastry into a ball with my hands until it seems firm enough. Then I use all the mixture to make more balls and then wrap them using plastic wrap. 

Since I made 4 batches of the above pastry yesterday I had to repeat the above process 4 times. You can cut your time in half by doing 2 batches using double the ingredients for each. I couldn't do that because I was using all my large bowls.

The 4 batches of pastry yielded me 10 small mince pies, 10 medium ones and 4 large ones. I didn't cover the mince pies completely but I had enough pastry left to do so. So if you end up making 4 batches like I did, you can either have all the mince pies fully covered with pastry or do about 4 extra small mince pies. In this case you would have to use less mince meat for each mince pie since I had no mincemeat left.

For what concerns the assembling of mince pies this is what I did: I greased all the tins with soy butter; I cut pieces of pastry with my hands and pushed the pastry into the tin using my fingers. I did this for all the tins and while I was doing so I placed the tins in the freezer so that the pastry could become more firm. Then I took them out of the freezer, filled them with mincemeat and topped them with the pastry shapes (I used a large star and a Christmas tree) which I had already prepared and froze for few minutes. Then I baked them for about 20 minutes each alternating them between the lower and higher levels of my oven. Then I let them cool and stored them. And of course I enjoyed 2 with a hot barley cup.


What about you? Did you make your own mince pies this year? Do you plan on making them? If yes, you are still in time for Christmas or you can always do them for the New Year's Eve. If not you can find a confectionery or a local artisan market which sells them. Feel free to leave links to your mince pies recipe or pictures.

STAY FAB
&
MERRY CHRISTMAS

Nov 28, 2012

Carob Spelt Cake with Carrot & Orange

Last Monday I had boiled several carrots to make a carrot and lemon dip. Since I had some leftover carrots I decided to make a healthy cake with no sugar, spelt flour and carob powder instead of chocolate. Because it came delicious I decided to share the recipe. So here it is...


INGREDIENTS
3 medium carrots peeled, chopped and boiled
2 oranges juiced
2 small eggs
200g spelt flour
2 tablespoons carob powder
2 tablespoons melted soy butter
2 teaspoons baking powder
some honey syrup

PREPARATION
1. First blend the carrots with the juiced oranges.
2. Then mix the carrot and orange blended mixture with the rest of the ingredients until you achieve a smooth consistency.
3. Then pour the cake batter in a cake casserole previously greased.
4. Bake in a preheated oven for about 40 minutes (in the middle of your oven).


CAROB SAUCE
I covered my cake with a carob sauce made with 2 tablespoons carob powder, 2 teaspoons vanilla essence, some honey syrup and enough soy milk to achieve the right consistency. Mix over your stove until it tickens enough to pour onto the cake. Finally sprinkle icing sugar.


STAY FAB

Nov 23, 2012

Hummus Dip.....with extra lemon & no tahini

Whether you are going Black Friday Shopping or have decided to enjoy the day relaxing at home, this is the perfect recipe to make quickly and enjoy with no guilt. Eaten with either some chopped veggies like lettuce, carrots, cucumbers, peppers or with few wholemeal rusks or crackers, this fresh low calories hummus is perfect to detoxify yourself after your Thanksgiving big lunch or dinner. The great thing is that you can make more of it and save it for up to one week. You can give it to your kids for school on some fresh healthy sliced brown bread and take it to work. So here is the recipe...


INGREDIENTS
1 tin chickpeas (about 200g drained) washed and drained
6 tablespoons lemon juice
1 tablespoon olive oil (or more if you prefer)
salt, pepper and lemon pepper (as much as you like)

BLENDING THE INGREDIENTS
Simply put all of the above ingredients into your blender and press on. Low speed blending/chopping is enough for this recipe. I used my Grundig BL5040 which I reviewed here. It's really great to make many recipes including dips like this one. 

STORE YOUR HUMMUS
Transfer the hummus obtained in a small bowl (which is what this recipe makes; you can of course double the ingredients if you have a large family or want to freeze the hummus). Cover with cling wrap and refrigerate.

What are you eating this Black Friday?

STAY FAB